Installation of graspPlugin environment
Installing OpenRTM
Install OpenRTM-aist 1.0.0-RELEASE on Ubuntu 10.04 using the batch setup script. If you have already completed the installation of OpenRTM, you can skip this section and proceed to the next section.
Download the batch setup script, pkg_install_ubuntu.sh for Ubuntu, from the OpenRTM-aist-1.0.0-RELEASE website ((http://www.openrtm.org/openrtm/ja/node/849).
(Note: The file is listed as “pkg_install_ubuntu.sh” on the website, but the name actually changes to “pkg_install_ubuntu100.sh” when downloaded.)
When not using a browser, the file can be downloaded via wget as follows: (from here on, the lines inside the text box starting with a “%” represent commands entered at the computer terminal; however, do not include the “%” at the beginning of your entries at the computer terminal.)
% wget http://openrtm.org/svnroot/OpenRTM-aist/trunk/OpenRTM-aist/build/pkg_install100_ubuntu.sh
The necessary packages are automatically installed when the following script is executed at the command line.
% sudo sh pkg_install100_ubuntu.sh
Prompts, such as those described below, appear many times during execution. Respond with a “y” to all such prompts and continue.
Example 1
 No repository entry for OpenRTM-aist is configured in your system.
 repository entry for OpenrRTM-aist:
    deb http://www.openrtm.de/pub/Linux/ubuntu/ lucid main
 Do
Example 2
 After this operation, XXXMB of additional disk space will be used.
 Do you want to continue [Y/n]?
Example 3
 WARNING: The following packages cannot be authenticated!
   xxxx-xxx
 Install these packages without verification [y/N]?
When prompted for “”[Y/n],” pressing the Enter key would be considered a “y” and installation would proceed. However, when prompted for “[y/N],” unless the “y” key is explicitly pressed and followed by the Enter key, the entry would be considered an “n” and the installation would be aborted. If the installation is aborted accidentally, execute the pkg_install_ubuntu.sh package once again.
Building Choreonoid
The installation procedure for Choreonoid (integrated software for choreographing robotic motions) is outlined below. In this section, only Choreonoid is built and executed, instead of installing the graspPlugin in one shot. The installation directory is taken as “~/src/choreonoid-1.0.0.”
Acquiring the source for the build
Download the source package file “http://choreonoid.org/_downloads/choreonoid-1.0.0.zip” from the official Choreonoid site (http://choreonoid.org/en/). Unzip and extract the files by specifying “~/src” as the destination directory to create the “~/src/choreonoid-1.0.0” directory for the extracted files.
Once the computer has booted, make the “~/src/choreonoid-1.0.0” directory your current directory.
% cd choreonoid-1.0.0
Installing the required packages
Execute the batch installation script that is available at choreonoid /misc/script.
 % cd choreonoid/misc/script
 % sudo ./install-requisities-ubuntu.sh
  (an omittion)
 Need to get xxxMB of archives.
 After this operation, xxxMB of additional disk space will be used.
 Do you want to continue [Y/n]?
A large volume of packages will be installed. Re-execute the script if a failure occurs prior to completion.
 % sudo apt-get update
 % sudo ./install-requisities-ubuntu.sh
Installation of libgstreamermm-0.10-dev and libqt4-phonon-dev is also necessary, so enter them manually.
% sudo apt-get install libgstreamermm-0.10-dev libqt4-phonon-dev
Once this is completed, return to the Choreonoid directory.
% cd ../..
Building Choreonoid using ccmake
Invoke ccmake to generate the Makefile.
% ccmake .
ccmake displays only “EMPTY CACHE” on its first launch.
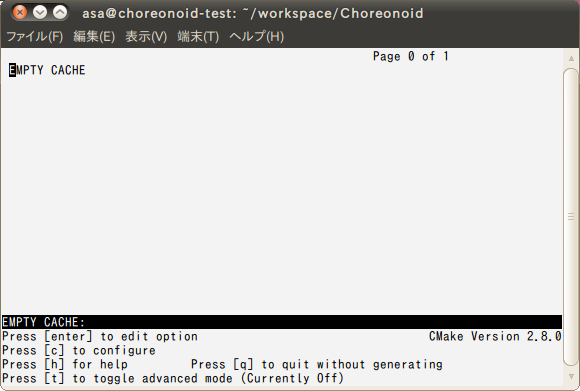
Figure 2. ccmake: EMPTY CACHE
On pressing the “c” key to configure, a menu showing the key and values should be displayed within a few seconds.
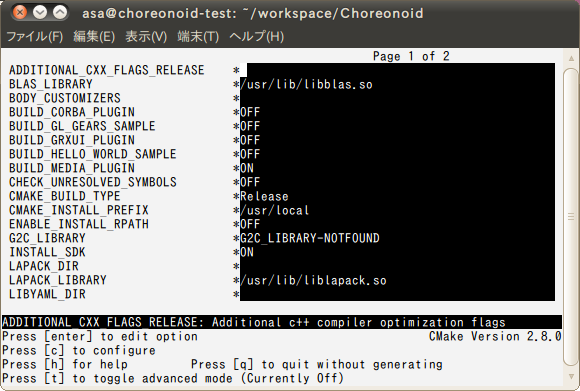
Figure 3. ccmake: configure
On pressing “c” again, a new menu item will be displayed in the lower section of the screen displaying the message, “Press [g] to generate and exit.”
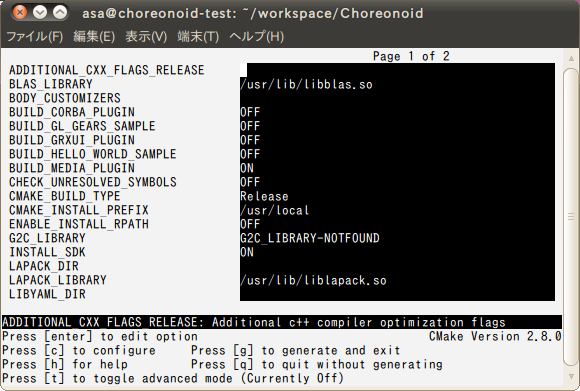
Figure 4. ccmake: generate and exit
Press “g” to exit ccmake. The Makefile will be generated by this “generate and exit” operation. Execute make and build Choreonoid.
% make
The execution time will vary depending on the PC used.
Invoking Choreonoid
Once the execution of make is completed, execute Choreonoid.
% bin/choreonoid
If a startup screen like the one shown below appears, Choreonoid has been built successfully.
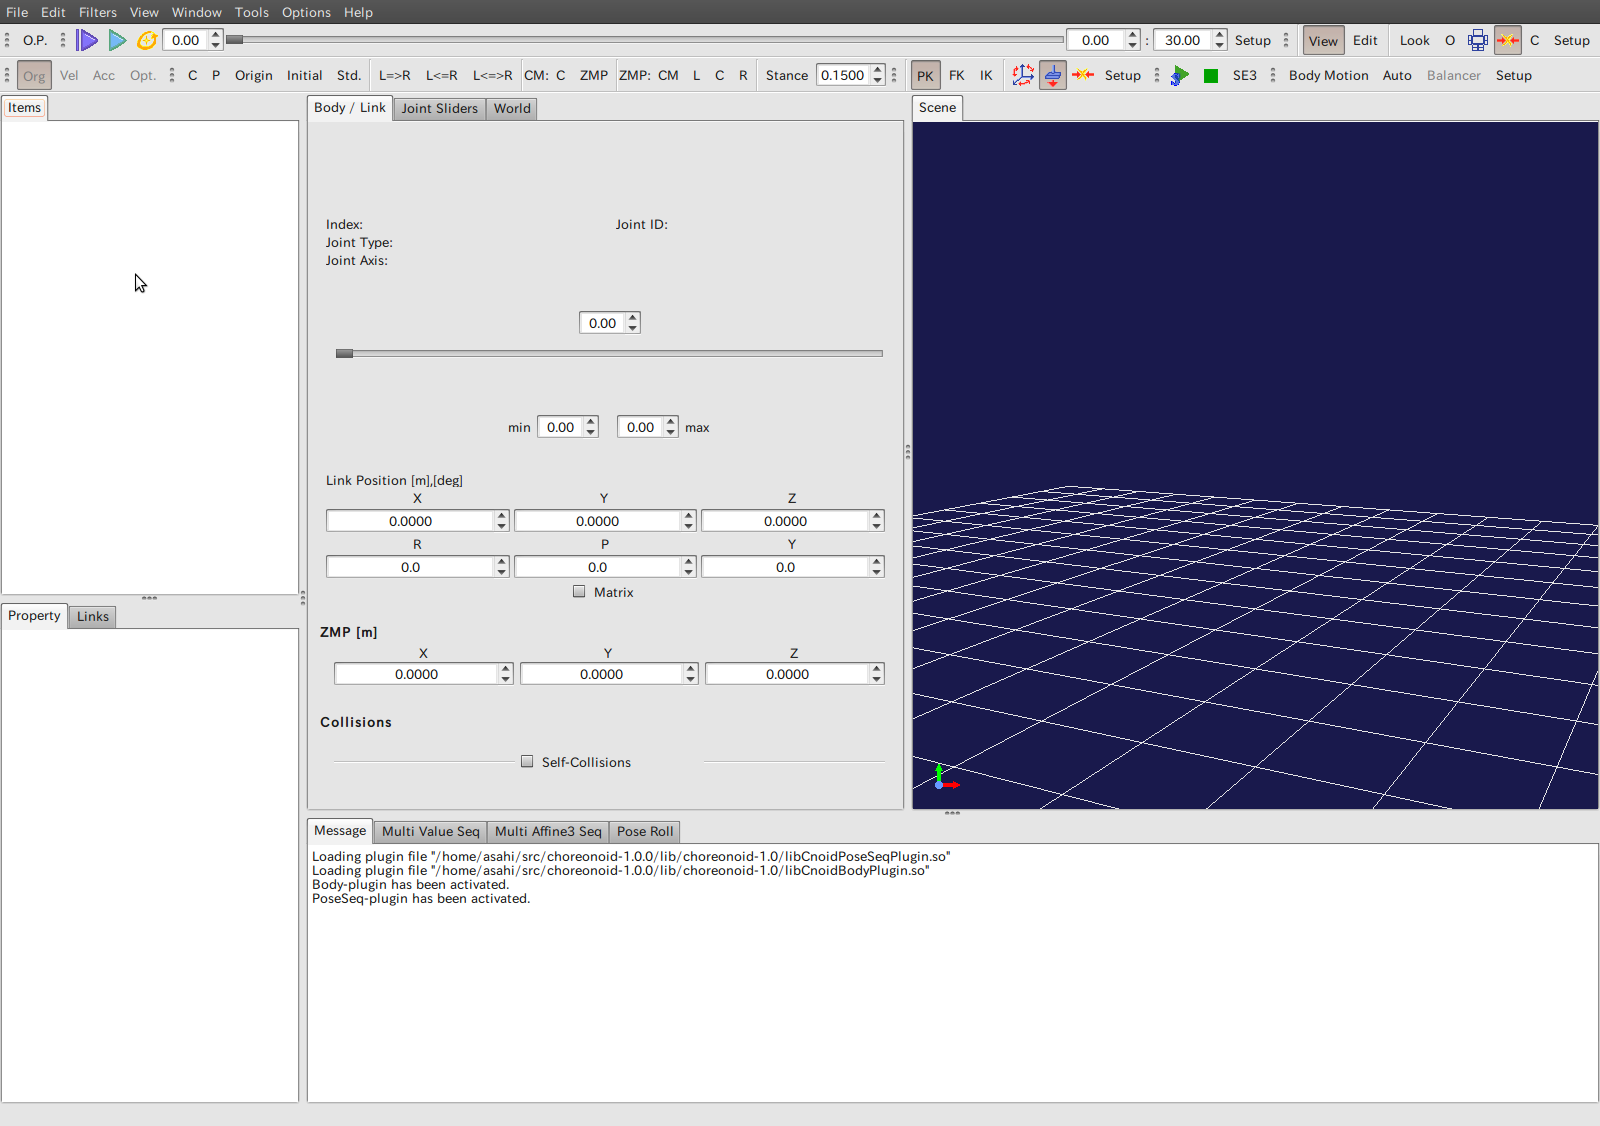
Figure 5. Choreonoid startup screen
Building graspPlugin
The procedure for installing graspPlugin is outlined below.
Installing essential software
It is essential that OpenRTM and Choreonoid be installed before the installation of graspPlugin.Installing Subversion
Since subversion is required for the installation of graspPlugin, install the same, if it is not already installed.
% sudo apt-get install subversion
graspPlugin source check out
Use subversion to check out and extract the graspPlugin source under the “extplugin” directory of “~/src/choreonoid-1.0.0.”
 % cd ~/src/choreonoid-1.0.0/extplugin
 % svn checkout http://grasp-plugin.googlecode.com/svn/trunk/graspPlugin
Installing essential packages
Execute the graspPlugin installation script (a user password is required).
% ./graspPlugin/Grasp/install-requisities-ubuntu.sh
Furthermore, the wx-common package is also required.
% sudo apt-get install wx-common
If the wx-common package is not present, the configure step of ccmake will fail with a “wxWidgets_wxrc_EXECUTABLE NOT FOUND” message.
Building graspPlugin using ccmake
In order to install graspPlugin as a plug-in, change Choreonoid’s build settings using ccmake.
 % cd ~/src/choreonoid-1.0.0
 % ccmake .
To build graspPlugin, it is necessary to edit the items using ccmake.
In ccmake, the items displayed on the left half of the screen with a white background are the keys, while the items displayed on the right half with a black background are the values for those keys. Use the “UP” and “DOWN” arrow keys to move the cursor to the desired item and press the Enter key to edit the desired value. After modifying the value, press the Enter key again. This releases the cursor to move UP and DOWN again.
Pressing the “c” key twice will configure and create two items: GRASP_PLUGINS and GRASP_ROBOT_MODEL_PLUGINS.
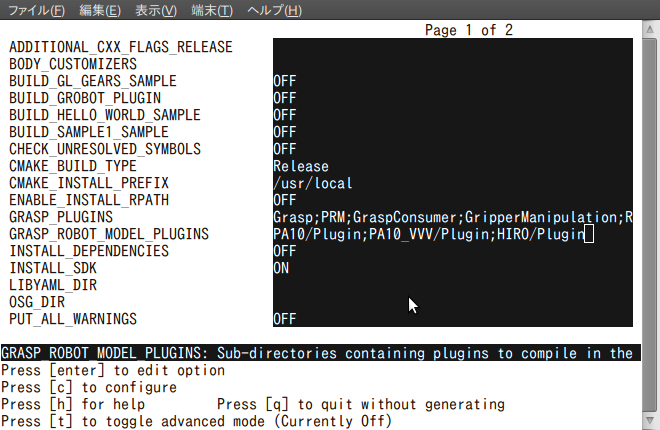
Figure 6. ccmake: Editing the keys
Set the following values to the respective items:
| Key | Value |
|---|---|
| GRASP_PLUGINS | Grasp;PRM;GripperManipulation;VisionTrigger;RobotInterface |
| GRASP_ROBOT_MODEL_PLUGINS | HIRO/Plug-in |
Once the values have been edited, press “c” to configure. Next, press the “g” key to generate the makefile and exit. Then, execute make to build Choreonoid and the plug-in.
% make
Execution
Execute Choreonoid.
% bin/choreonoid
If a screen like the one below is displayed, the execution is successful.
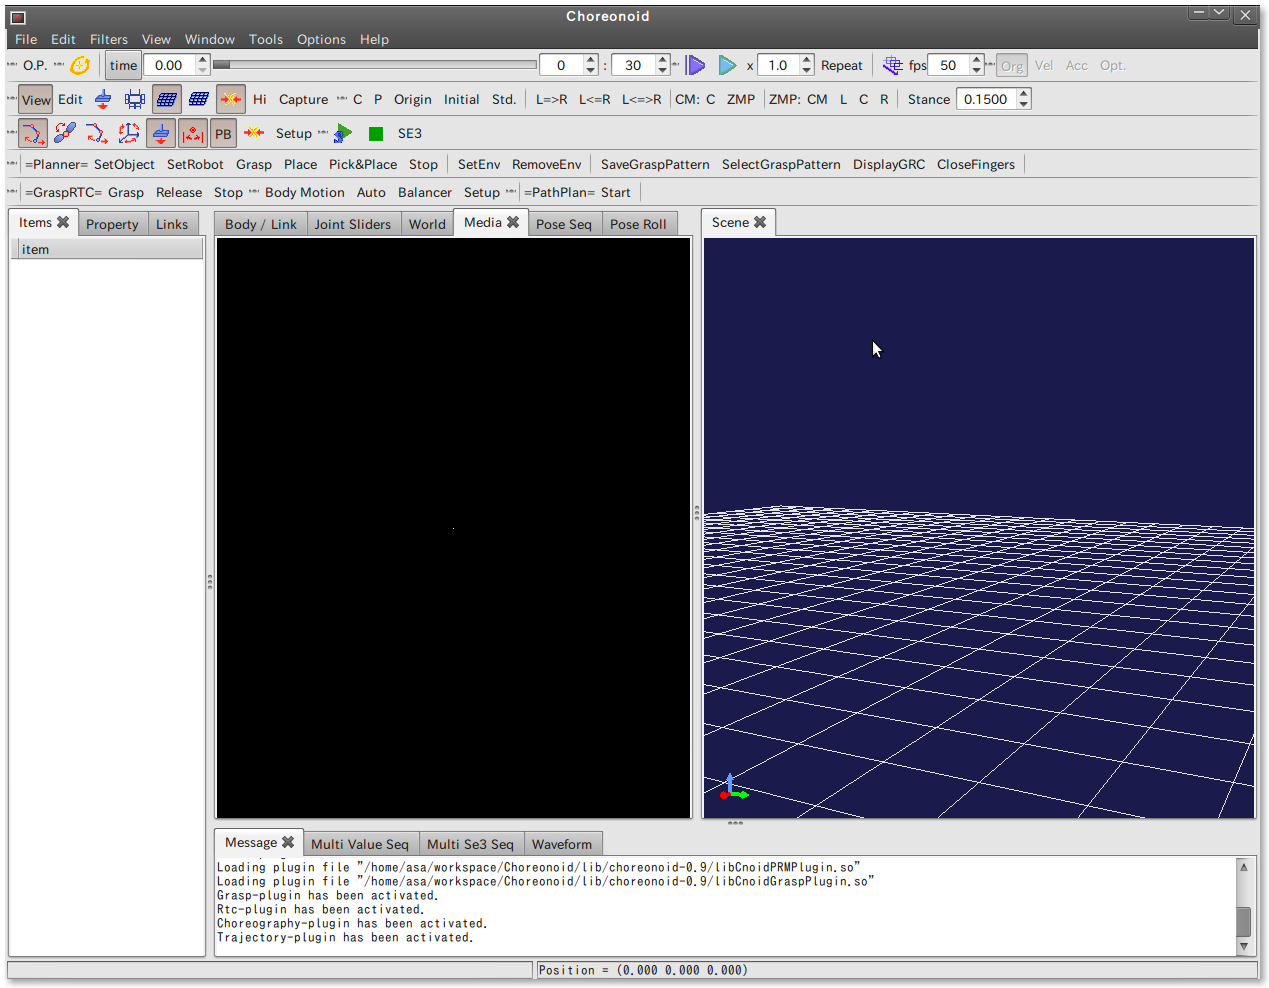
Fig 7. graspPlugin execution screen
In comparison to the build using Choreonoid alone, the toolbar now contains increased options due to the addition of graspPlugin. Furthermore, messages to the effect of “.... plug-in file being loaded” and “... plug-in being activated” are displayed in the message tab.
Building GraspPlannerComp(Option)
The compilation method for the grasping motion planning module, GraspPlannerComp, is described below.
Preparing the environment
It is assumed here that the installation of Choreonoid has already been completed.
Building
Navigate to the directory where the source for the GraspPlanner main body is located and then execute make.
 % cd ~/workspace
 % cd Choreonoid/extplugin/graspPlugin/GraspConsumer/GraspPlan20100623/
 % make
Build is executed in the process briefly outlined below.
 `rtm-config --idlc` `rtm-config --idlflags` -I`rtm-config --prefix`/include/rtm/idl GraspController.idl
 rtm-skelwrapper --include-dir="" --skel-suffix=Skel --stub-suffix=Stub --idl-file=GraspController.idl
 GraspControllerSkel.h  was generated.
 GraspControllerSkel.cpp  was generated.
 GraspControllerStub.h  was generated.
 GraspControllerStub.cpp  was generated.
 rm -f GraspPlanner.o
 g++ `rtm-config --cflags` -I. -c -o GraspPlanner.o GraspPlanner.cpp
 rm -f GraspPlanningImpl.o
 g++ `rtm-config --cflags` -I. -c -o GraspPlanningImpl.o GraspPlanningImpl.cpp
 rm -f GraspControllerSkel.o
 g++ `rtm-config --cflags` -I. -c -o GraspControllerSkel.o GraspControllerSkel.cpp
 rm -f GraspControllerSVC_impl.o
 g++ `rtm-config --cflags` -I. -c -o GraspControllerSVC_impl.o GraspControllerSVC_impl.cpp
 rm -f GraspPlanner.so
 g++ -shared -o GraspPlanner.so GraspPlanningImpl.o GraspPlanner.o GraspControllerSkel.o   GraspControllerSVC_impl.o   `rtm-con rm -f GraspPlannerComp.o
 g++ `rtm-config --cflags` -I. -c -o GraspPlannerComp.o GraspPlannerComp.cpp
 g++ -o GraspPlannerComp GraspPlanningImpl.o GraspPlanner.o GraspControllerSkel.o   GraspControllerSVC_impl.o   GraspPlannerCom
If the final product, GraspPlannerComp, can be executed, then the process has been completed successfully.
% ./GraspPlannerComp
No message is displayed for the execution.
Installing the full complement of Eclipse(Option)
In order to run the full complement of Eclipse (OpenRTM Eclipse tools), the JDK from Sun is required, rather than the Ubuntu standard Open JDK.
Installing sun-java6-jdk
In order to install JDK sun-java6-jdk from Sun, the apt repository must first be added and then the package list must be obtained.
 % sudo add-apt-repository "deb http://archive.canonical.com/ lucid partner"
 % sudo apt-get update
At this point, he installation of the JDK package is now possible.
 % sudo apt-get install sun-java6-jdk
 Upgrades: 0; new installation: 8, deletions: 0; retentions: 0.
 An archive of 57.0 MB must be acquired; 168 MB of additional disk space will be used up following this operation.
The following screen display is shown during the process. Select “OK” and continue.
When the following screen is displayed, select “Yes.”
Once the installation is complete, set java in the default setting to sun-java6.
% sudo update-alternatives --config java
If the following message appears at this point, then there are no problems.
There is only one alternative in link group java: /usr/lib/jvm/java-6-sun/jre/bin/java Nothing to configure.
If the message is something like the one shown below, then it will be necessary to manually ensure that it is called Sun Java.
There are 3 choices for the alternative java (providing /usr/bin/java). Selection Path Priority Status -------------------------------------------------------- 0 /usr/lib/jvm/java-6-openjdk/jre/bin/java 1061 auto mode * 1 /usr/bin/gij-4.4 1044 manual mode 2 /usr/lib/jvm/java-6-openjdk/jre/bin/java 1061 manual mode 3 /usr/lib/jvm/java-6-sun/jre/bin/java 63 manual mode Press enter to keep the current choice[*], or type selection number:
In this case, look for the one with “/usr/lib/jvm/java-6-sun/jre/bin/java” in the Path column. Since “3” is “Sun Java” here, press “3” then enter, to switch the default java to Sun.
Installing the main body of Eclipse with full complement
Download Full complement package for Linux from OpenRTM Eclipse tools 1.0-RELEASE and implement it under workspace in the home directory (for example).
 % cd workspace
 % wget http://www.openrtm.org/pub/OpenRTM-aist/tools/1.0.0/eclipse342_rtmtools100release_linux_ja.tar.gz
 % tar xzf eclipse342_rtmtools100release_linux_ja.tar.gz
 % cd eclipse
If ./eclipse is booted without any changes the splash screen will be displayed, followed by an empty window, and a normal start up will not occur.
The following command line is therefore used for booting.
% ./eclipse -clean -vmargs -Dorg.eclipse.swt.browser.XULRunnerPath=/usr/lib/xulrunner-1.9.2.13/xulrunner
When this option is used to boot once or several times, it appears that booting can be accomplished with ./eclipse alone. Add a launcher for the custom application in the panel and set the command to /home/(user name )/workspace/eclipse/eclipse to boot Eclipse without using a terminal.
Set /etc/hosts
On RT System Editor of Eclipse, Name Server View may not become effective.
It is avoidable by commenting out the IPv6 item of /etc/hosts.
% sudo gedit /etc/hosts
Example: /etc/hosts
127.0.0.1 localhost
127.0.1.1 yourservername # (note: your host name)
- The following lines are desirable for IPv6 capable hosts
- ::1 localhost ip6-localhost ip6-loopback
- fe00::0 ip6-localnet
- ff00::0 ip6-mcastprefix
- ff02::1 ip6-allnodes
- ff02::2 ip6-allrouters
- ff02::3 ip6-allhosts