Building graspPlugin
The procedure for installing graspPlugin is outlined below.
Installing essential software
It is essential that OpenRTM and Choreonoid be installed before the installation of graspPlugin.Installing Subversion
Since subversion is required for the installation of graspPlugin, install the same, if it is not already installed.
% sudo apt-get install subversion
graspPlugin source check out
Use subversion to check out and extract the graspPlugin source under the “extplugin” directory of “~/src/choreonoid-1.0.0.”
 % cd ~/src/choreonoid-1.0.0/extplugin
 % svn checkout http://grasp-plugin.googlecode.com/svn/trunk/graspPlugin
Installing essential packages
Execute the graspPlugin installation script (a user password is required).
% ./graspPlugin/Grasp/install-requisities-ubuntu.sh
Furthermore, the wx-common package is also required.
% sudo apt-get install wx-common
If the wx-common package is not present, the configure step of ccmake will fail with a “wxWidgets_wxrc_EXECUTABLE NOT FOUND” message.
Building graspPlugin using ccmake
In order to install graspPlugin as a plug-in, change Choreonoid’s build settings using ccmake.
 % cd ~/src/choreonoid-1.0.0
 % ccmake .
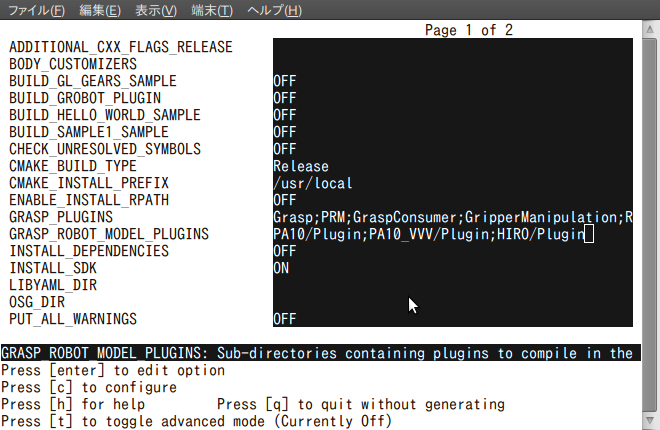
To build graspPlugin, it is necessary to edit the items using ccmake.
In ccmake, the items displayed on the left half of the screen with a white background are the keys, while the items displayed on the right half with a black background are the values for those keys. Use the “UP” and “DOWN” arrow keys to move the cursor to the desired item and press the Enter key to edit the desired value. After modifying the value, press the Enter key again. This releases the cursor to move UP and DOWN again.
Pressing the “c” key twice will configure and create two items: GRASP_PLUGINS and GRASP_ROBOT_MODEL_PLUGINS.

Figure 6. ccmake: Editing the keys
Set the following values to the respective items:
| Key | Value |
|---|---|
| GRASP_PLUGINS | Grasp;PRM;GripperManipulation;VisionTrigger;RobotInterface |
| GRASP_ROBOT_MODEL_PLUGINS | HIRO/Plug-in |
Once the values have been edited, press “c” to configure. Next, press the “g” key to generate the makefile and exit. Then, execute make to build Choreonoid and the plug-in.
% make
Execution
Execute Choreonoid.
% bin/choreonoid
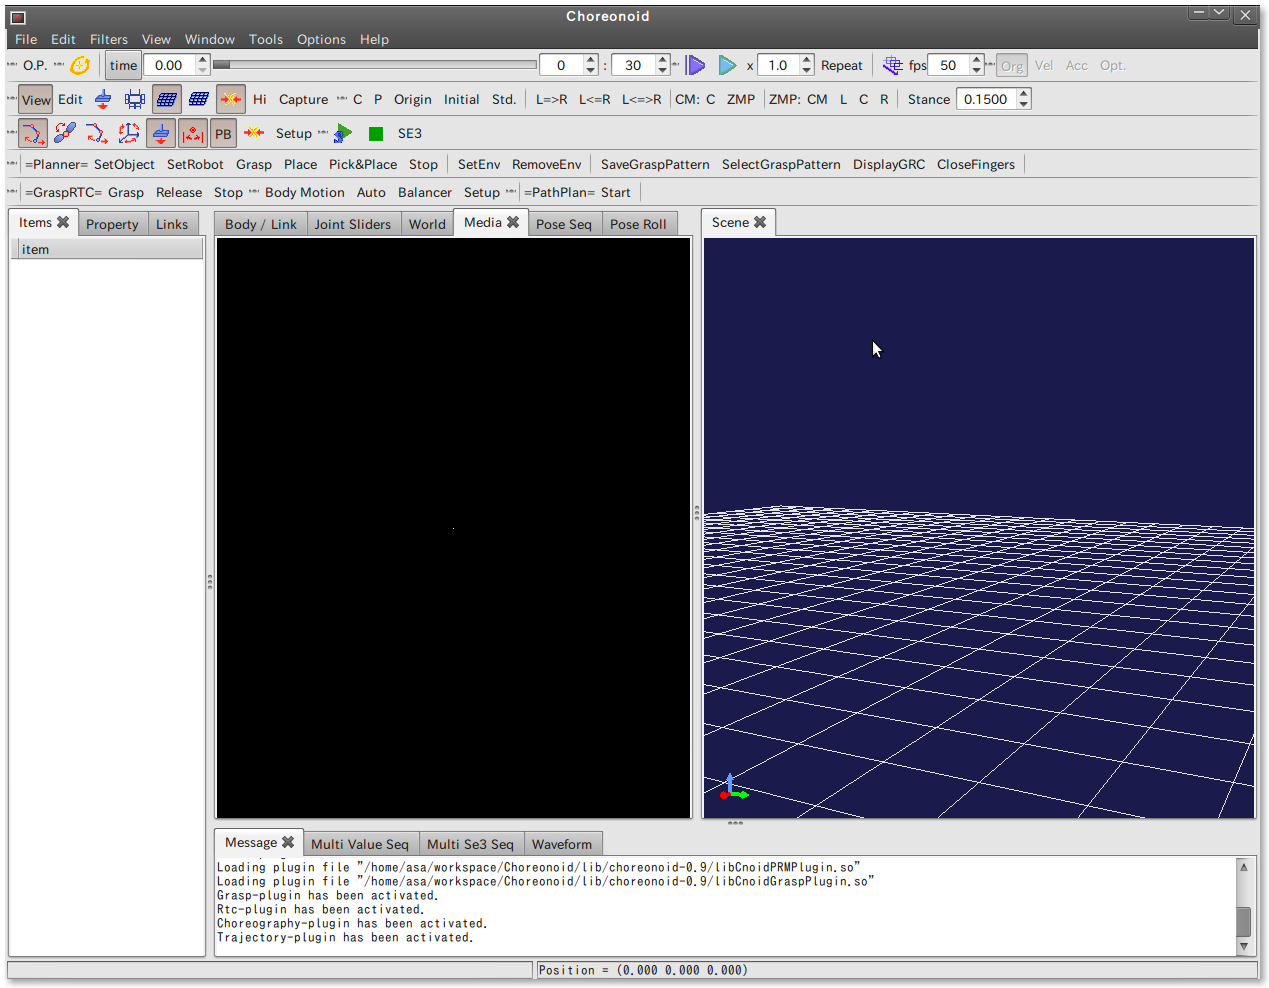
If a screen like the one below is displayed, the execution is successful.

Fig 7. graspPlugin execution screen
In comparison to the build using Choreonoid alone, the toolbar now contains increased options due to the addition of graspPlugin. Furthermore, messages to the effect of “.... plug-in file being loaded” and “... plug-in being activated” are displayed in the message tab.